This afternoon, my gorgeous friend Tiffany Grant-Riley of Curate & Display is making her debut as our resident DIY expert. Hoorah! I’ll be blogging a proper introductory piece on this fabulous human being soon but for today, you can read more about Tiffany on our ‘About Page‘. Over to you Tiff! Tootlepip! Love Annabel xx
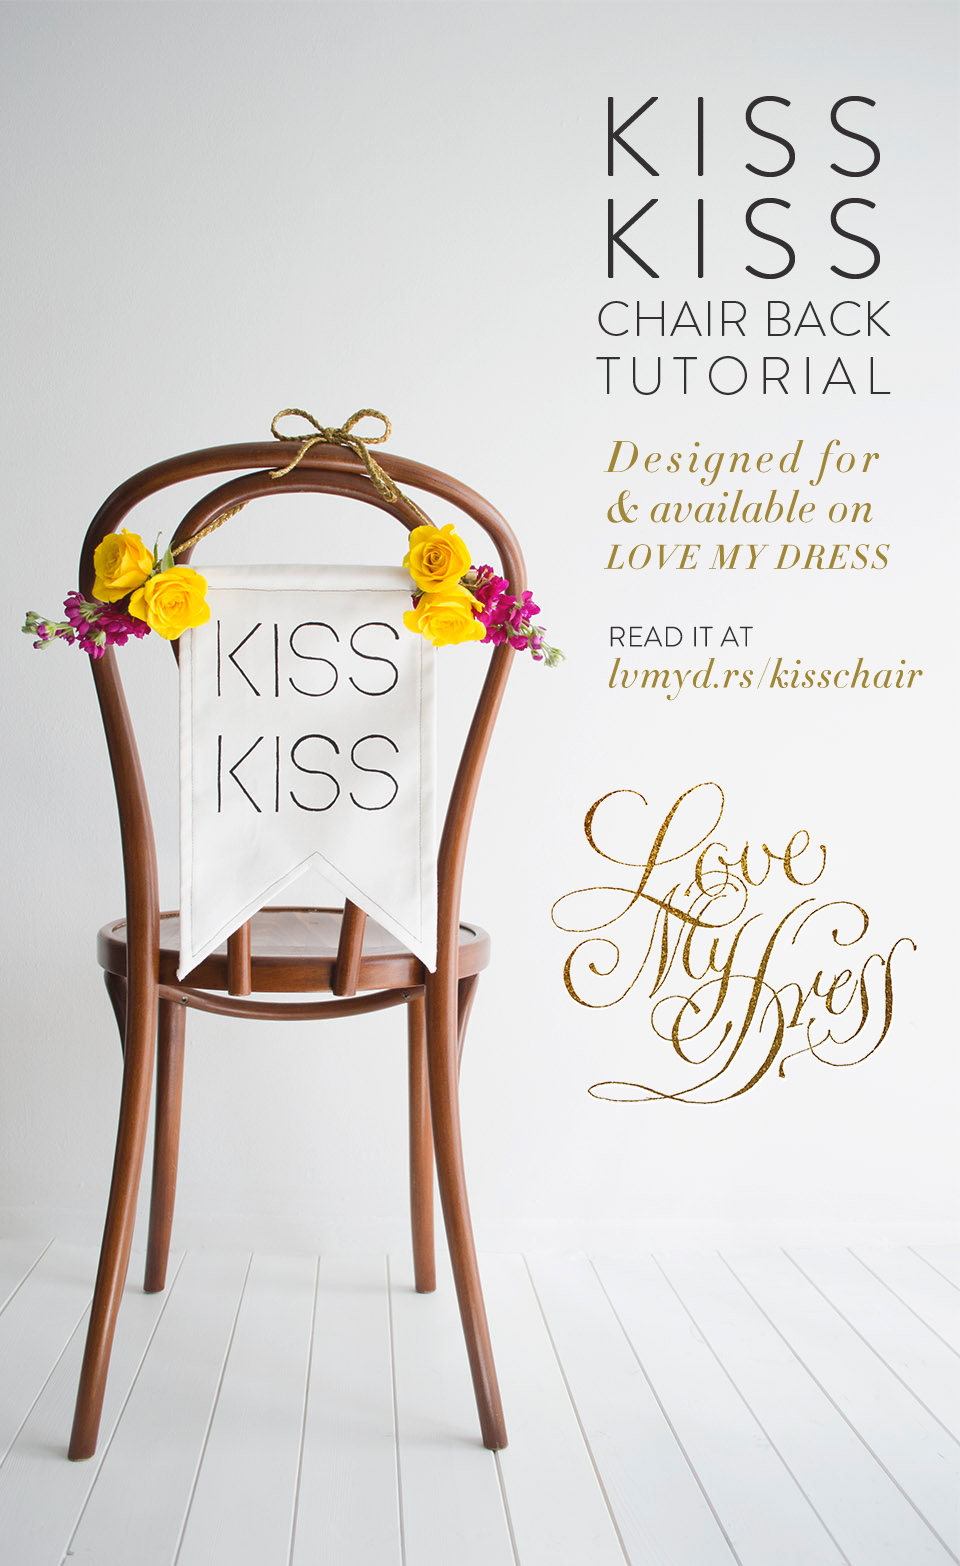
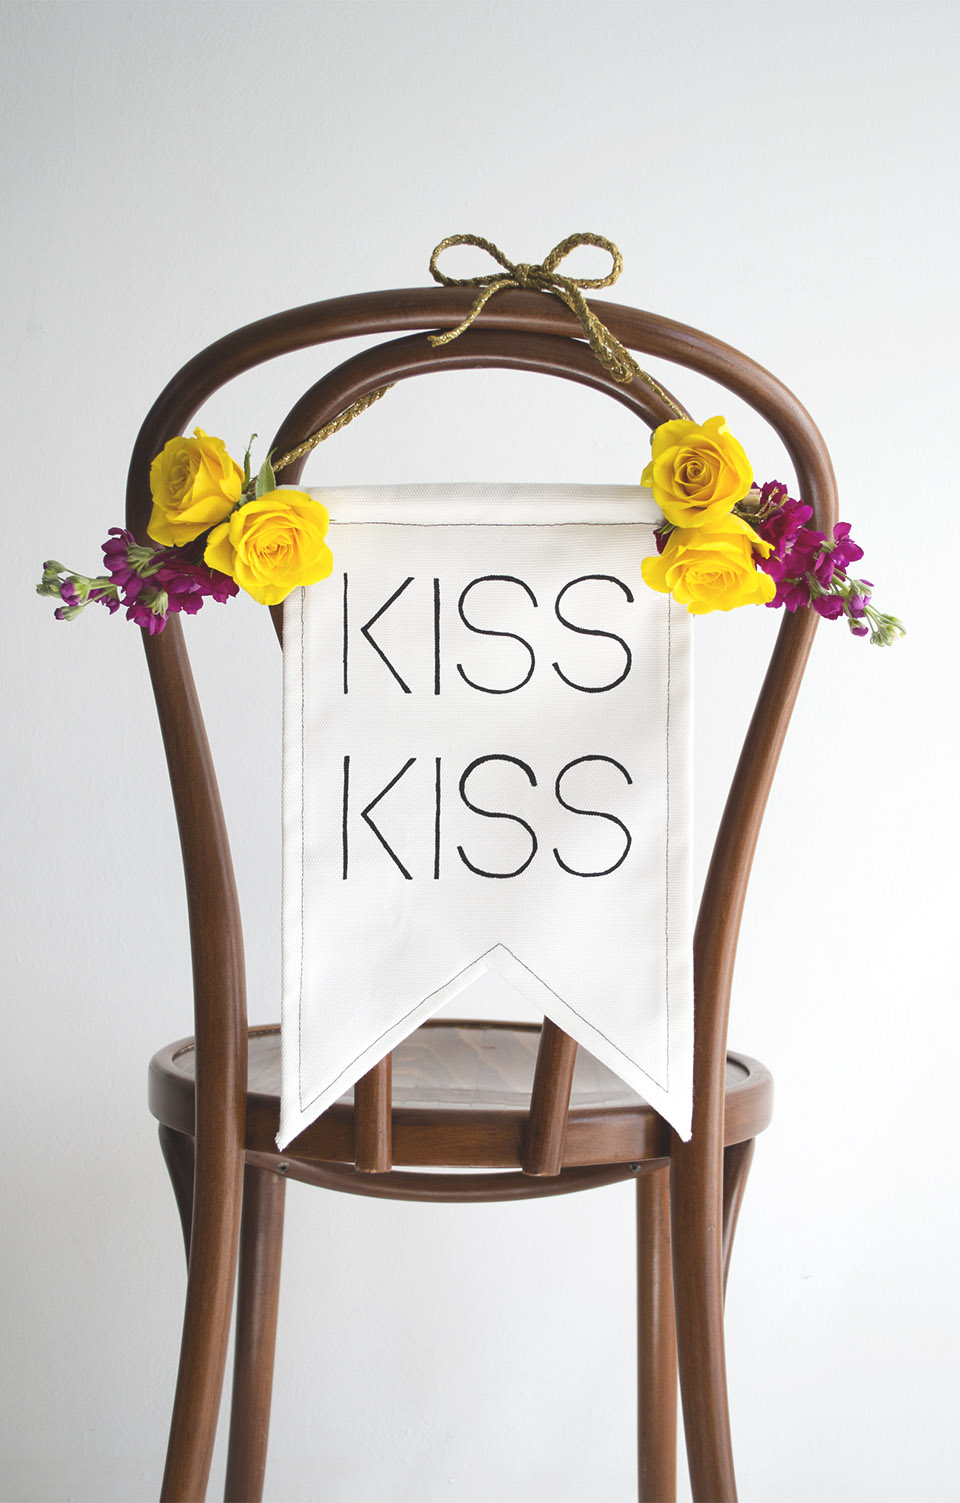
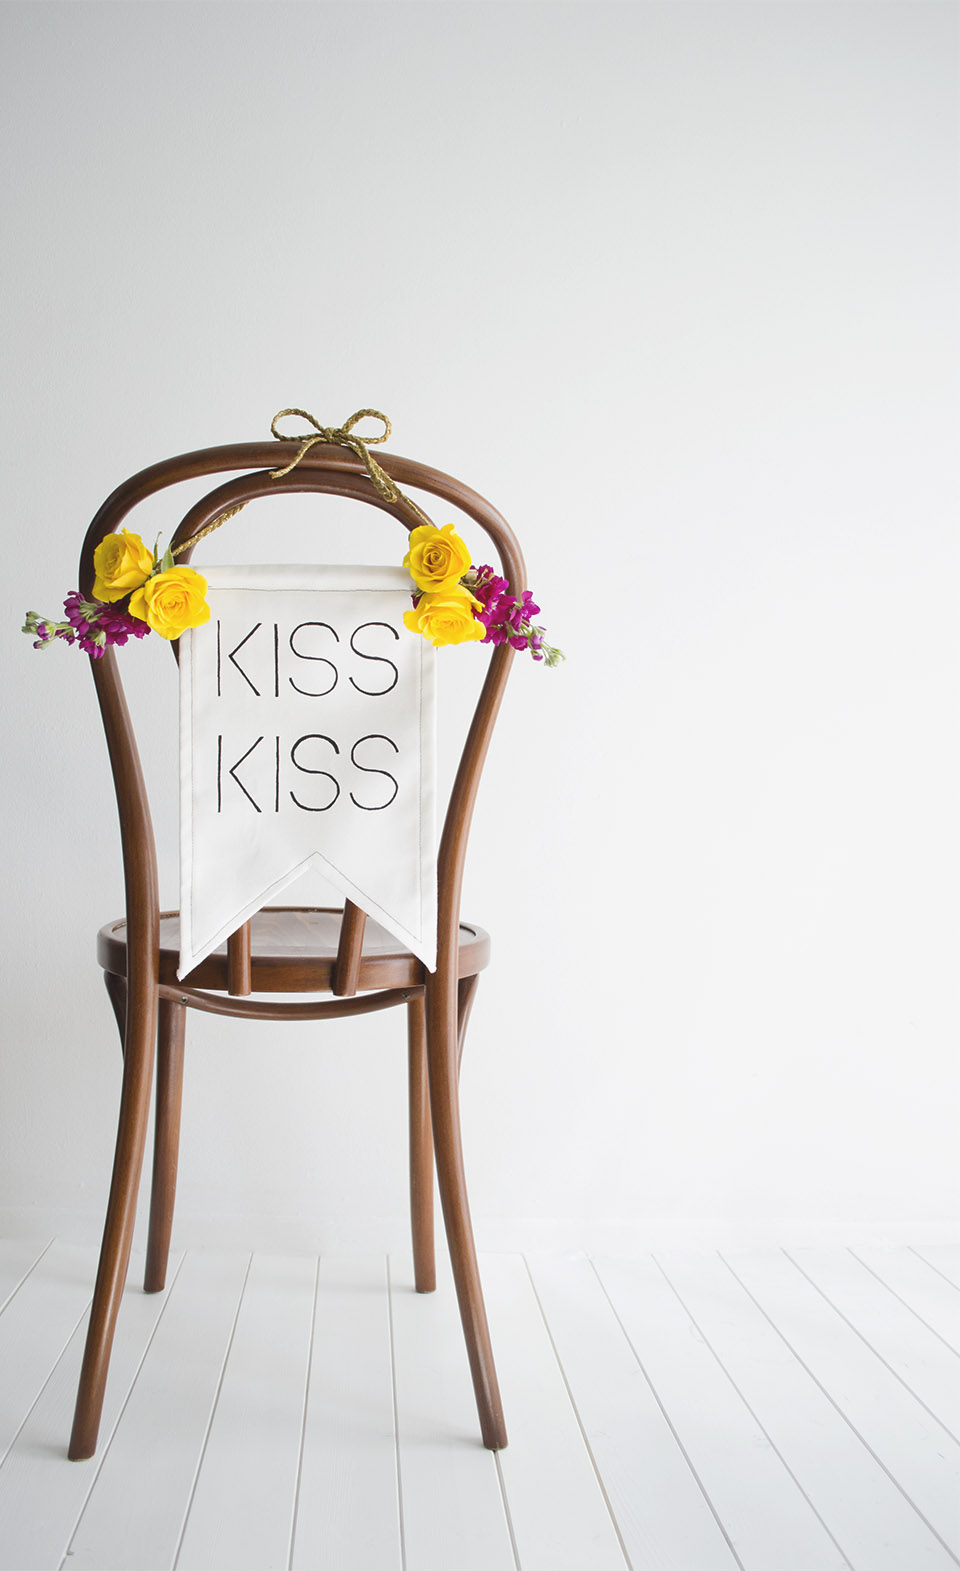
Well hello Love My Dress® readers! I’m rather chuffed to bits to be here contributing to this utterly gorgeous blog. Let’s get to it shall we? I thought I’d start my new DIY tutorial series with a focus on the humble wedding chair. This ‘Kiss Kiss’ canvas chair banner is a stylish way to spruce up a boring or slightly unattractive chair (yes, they exist and we all know Annabel’s aversion to the more traditional ‘chair cover’).
The best thing about this pretty banner is that you can hang it on your wall at home after your wedding. Cute idea right? Use fresh flowers for scent or silk for something more permanent. There are some amazing faux flowers around these days! Make two for you and your love when you sit side by side and if you’re feeling confident, choose your own wording and font using this tutorial as a guide.
Skill Level: Moderately Easy
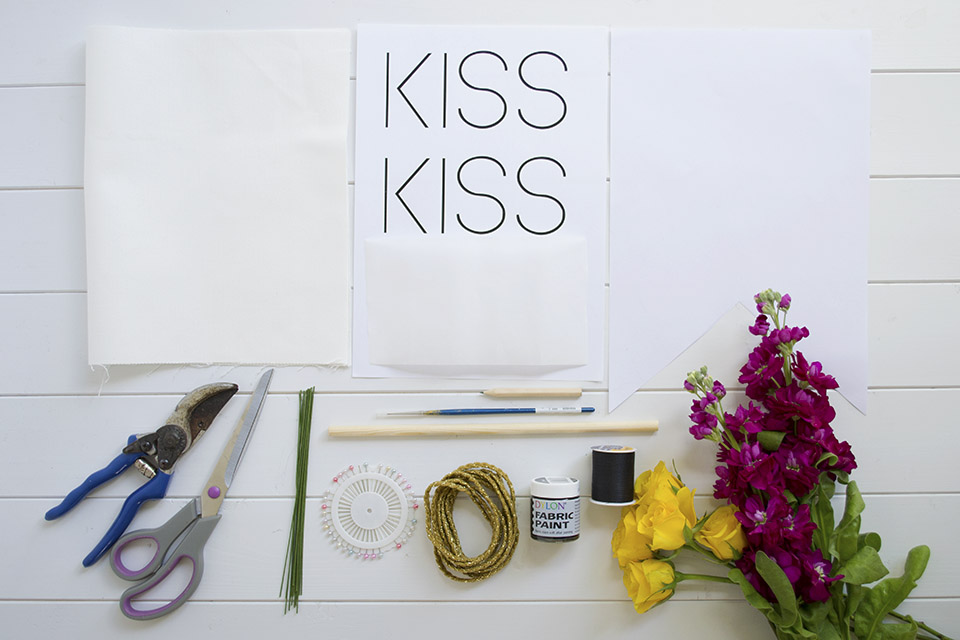
You Will Need:
- White canvas fabric
- Black cotton thread
- Paper banner template to suit the size of your chair (the dimensions of the banner you see here are width: 21.5 cm, length: 34cm, bottom sides, 14.5cm)
- A length of 9mm wide dowel rod to extend 1.5” either end of your banner
- Two 50cm pieces of ribbon
- Text printed in your favourite font (I chose ‘Arual‘ for its simplicity)
- Black fabric paint
- A pencil
- Tracing or greaseproof paper
- 18 gauge florist’s wire in green
- Fabric scissors
- A fine paint brush
- Secateurs or florist’s scissors
- Two yellow roses and two heads of *scented stocks
- Sewing machine or needle and thread
*these won’t stand up well without water so it’s worth asking your florist for advice for an alternative.
Step one:
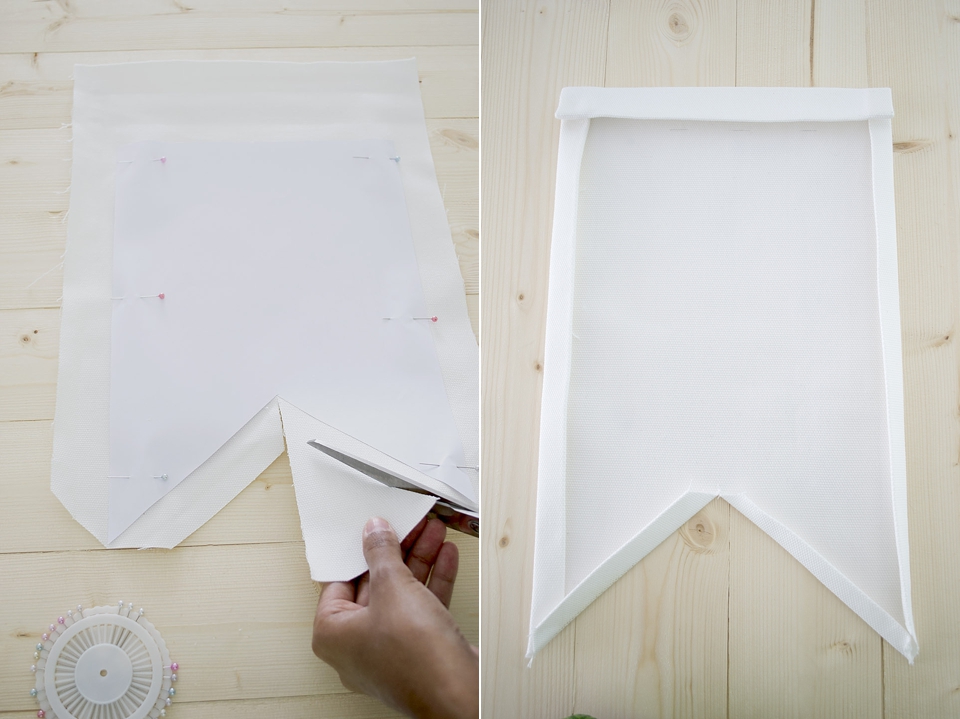
Iron your canvas and pin your paper template onto it, being sure to leave a 1” border around all sides and 3.5” at the top. As you cut the canvas, cut the bottom corners inwards at an angle to ensure that these tuck in neatly when you come to hem it.
Step Two:
Mark in pencil the edges of your template onto the canvas. Remove your template and iron your hem into place. Fold in the left and right sides half way to your pencil marks, press, then fold them in half and press again up to your marks. For the top, fold halfway, press, fold again up to your pencil marks and press again. This will be where the dowel rod is pushed through.
Once pressed you can sew the edges without pinning them in place but pin them if you feel more secure this way.
Step Three:
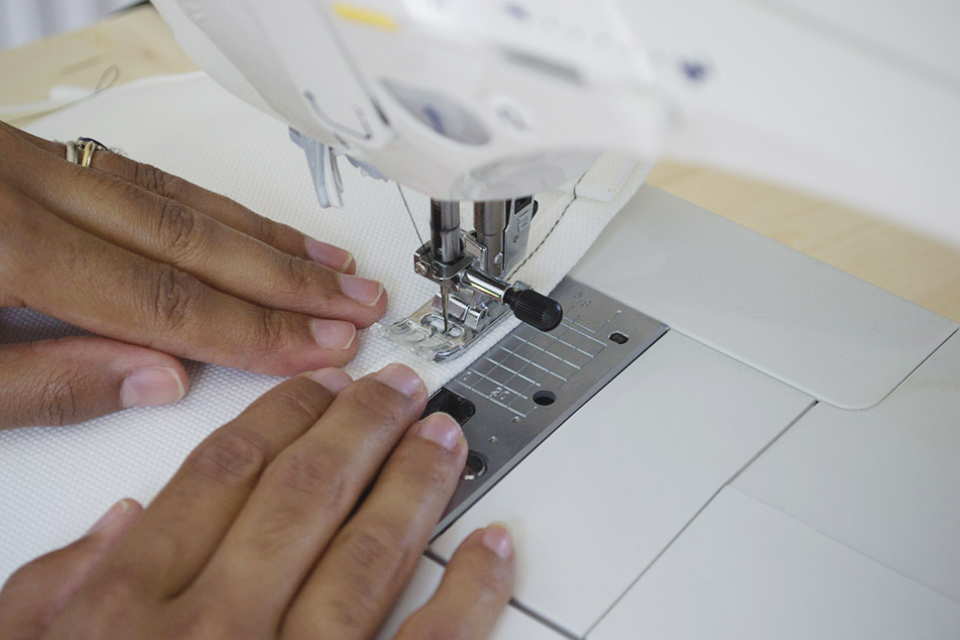
Thread your sewing machine with the black thread (bobbin included) and set it to a simple running stitch. Starting at the top left corner, sew a continuous running stitch all along the inside edge of your hem, making sure you leave the gap at the top for the rod. When you reach a corner, lift the foot on your machine with the needle down into the canvas, rotate the fabric, replace your foot and continue until you reach the beginning. Finish off your threads and cut.
Alternatively, you could just cut the canvas using pinking shears and hand sew the sleeve at the top for the dowel rod.
Step Four:
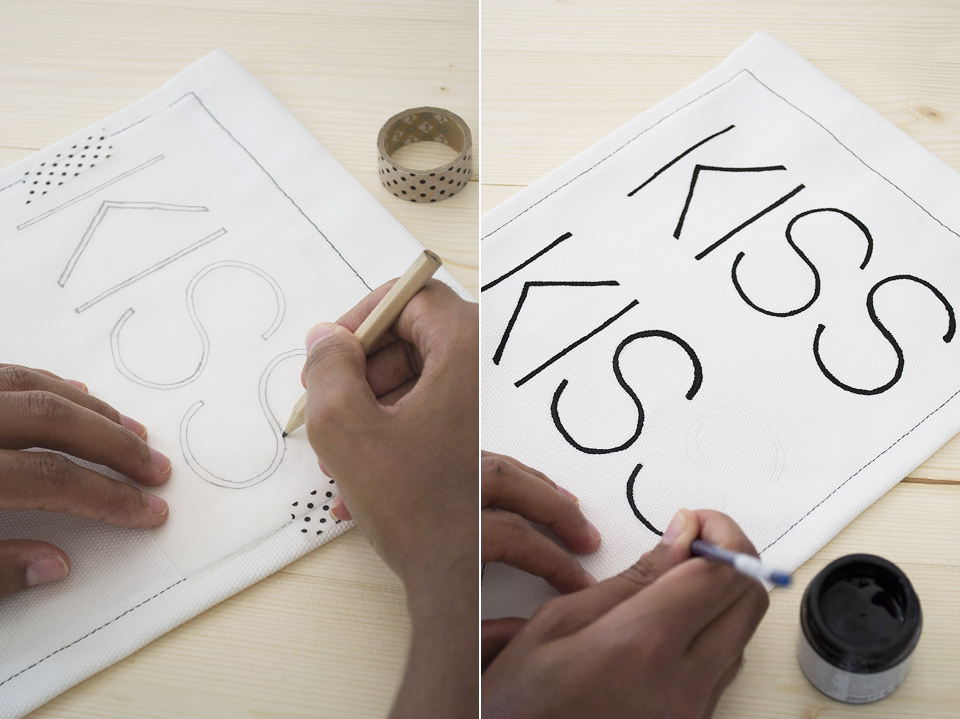
Trace your font on both sides of the tracing paper, then position and attach with a little tape to your banner and transfer it. If the pencil is too faint, go over it again before you paint.
Step Five:
Carefully paint over your outlines with black fabric paint. Be mindful of where you’re placing your hands as you go to ensure you’re not smudging the paint.
TIP: If you plan on washing your banner later on, I recommend ironing the text once dry on the hottest setting with a piece of fabric over the top to protect it, to seal the paint.
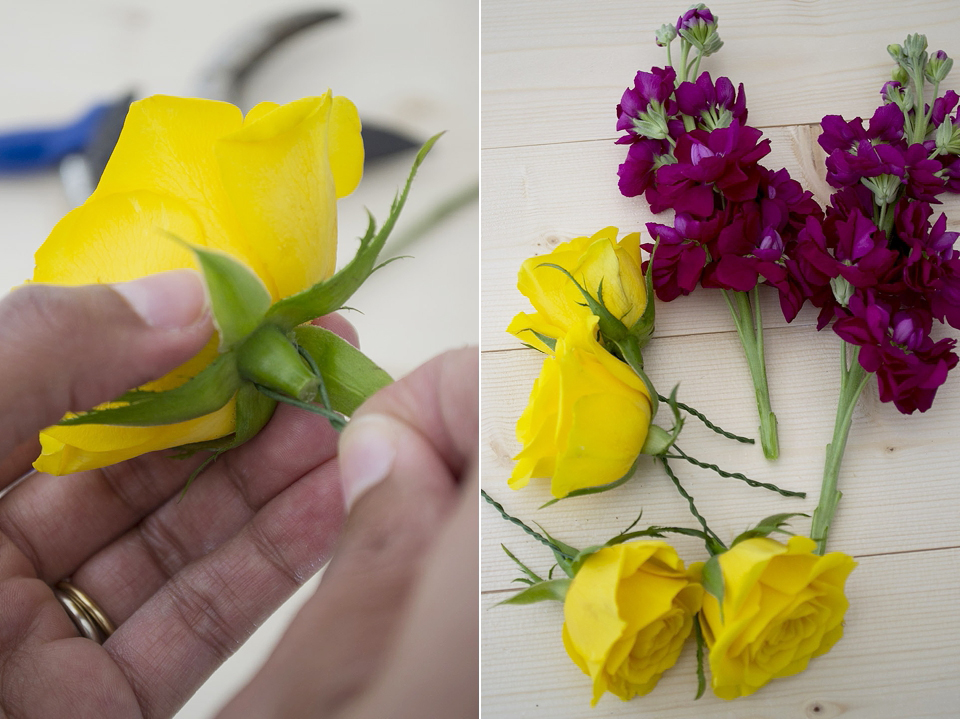
Wire the roses. Cut off the stems leaving the base of the flower, push the wire through the base and twist at the bottom. Cut off the excess wire, leaving approx. 3”.
Step Seven:
Wire the rest of your roses and remove 1 to 2” of flowers from the stems of your stocks.
Step Eight:
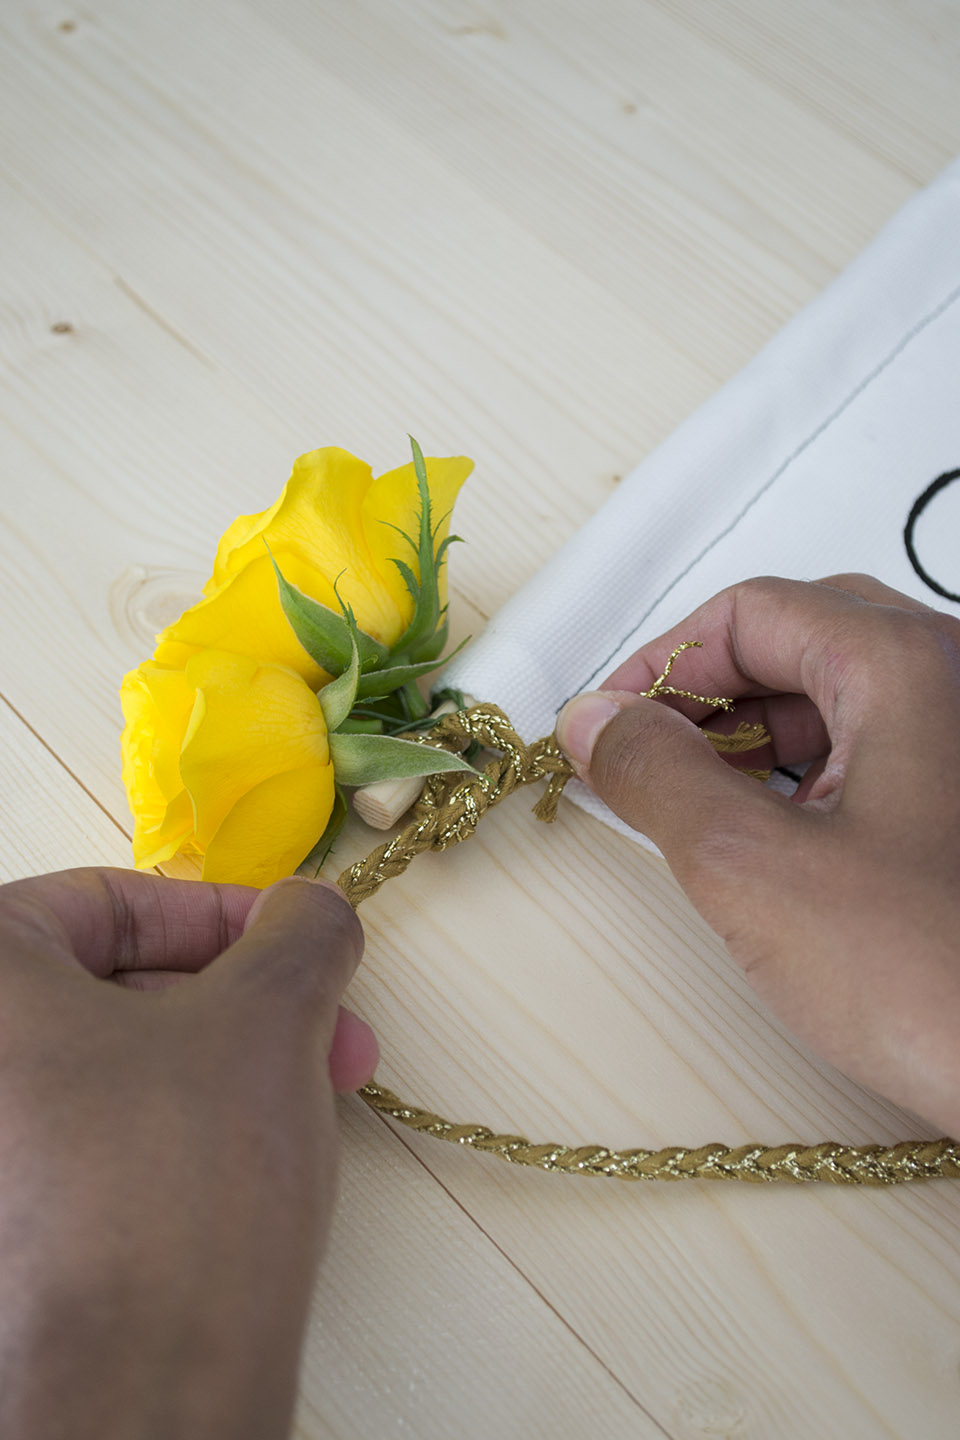
Feed through your dowel rod and tightly wrap two of the wired roses on either side of it. Tie a length of ribbon on either side of that to secure the roses completely.
Step Nine:
Feed your stock stems through the sleeve on your banner on either side.
Step Ten:
Tie the banner onto the back of your chair and trim off any excess ribbon.
Et voila!
I hope you have loved this DIY tutorial and would really appreciate your feedback! I’d really love to know if you fancy trying this out and how you get on. You can share your thoughts, comments and questions via any of the Love My Dress® social media channels like Facebook, Twitter, Pinterest, Instagram and Google+ (it needs to be said, Annabel is a bit obsessed with Google+!).
And when you’ve done that, I recommend you take a few minutes out to come and explore my Curate & Display blog. I think you’ll like it 🙂
This time next week I’ll be back with another pretty DIY offering.
Tiffany x
Images Copyright (c) Tiffany Grant Riley
Follow Love My Dress® on Google+

