Well I did say I was in the Christmas Spirit! This one is for all you DIY/crafty type, or those people like me who aren't particularly crafty but aspire to be and like to try something new every once in a while. Let's make our own Advent Calendar – YAY! ;) Huge thanks to the lovely Jenny Keegan from In The Treehouse for sending this lovely DIY feature my way. Over to you Jenny…
♥ ♥ ♥
Regular followers of our antics at the In The Treehouse Blog, will know that most of our DIY projects are bright, innovative, cheap & cheerful, but most importantly – easy to do – even if you don’t have a wealth of experience in crafty stuff. However, every now and then we like to take it up a notch and bring you something a bit special – even if it does require a little but more time.
Love My Dress Wedding Blog – All Imagery Copyright (c) 2011 In The Treehouse
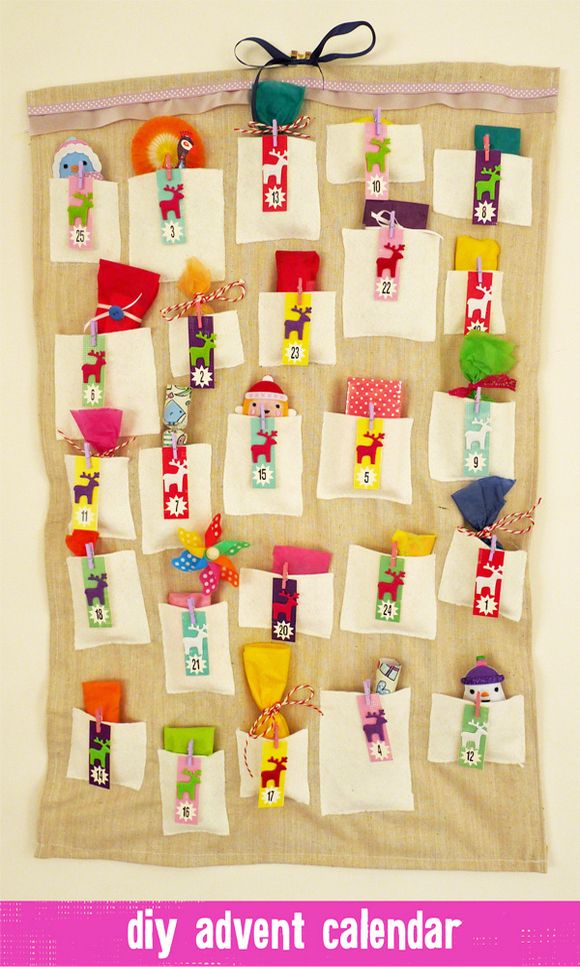
My lovely friend Leanne and I spent Thursday evening making some advent calendars – mine for my little girl, hers for a very special aunty. What better way to count down to Christmas that with a little colourful surprise every day –
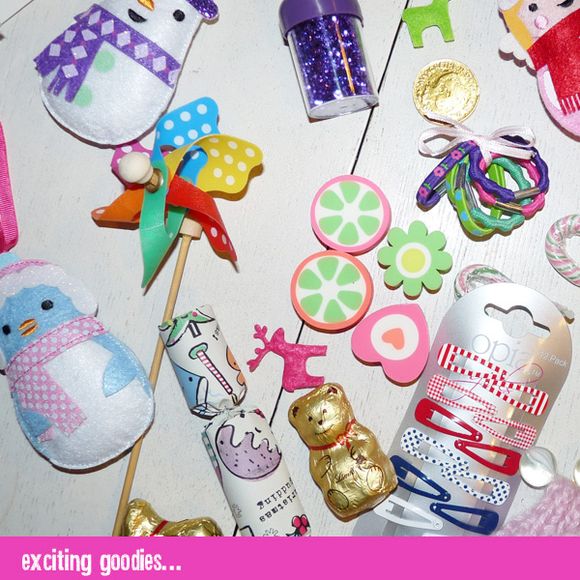
I filled the calendar for my daughter with small, inexpensive things which I know she’ll love – including sweets & chocolate (let’s face it, it is an advent calendar after all), hairbands, accessories, knickers, crafty bits like pots of glitter, lip balms and loads more. Leanne filled her auntie’s with a slightly more grown up array of goodies, such as cute floral packs of tissues, mini bottles of Cointreau, retro sweets & candy canes, tree decorations and the odd really special thing – like a beautiful vintage brooch.
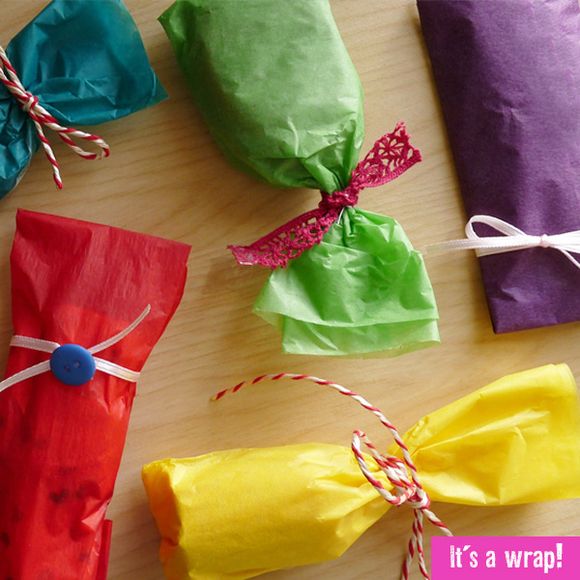
We chose to keep the fabric parts of our calendars neutral, so we could go crazy with the present wrapping, using loads of multi coloured tissue paper and trimmings such as butchers twine, ribbons, buttons & anything else we could find in the craft cupboard…
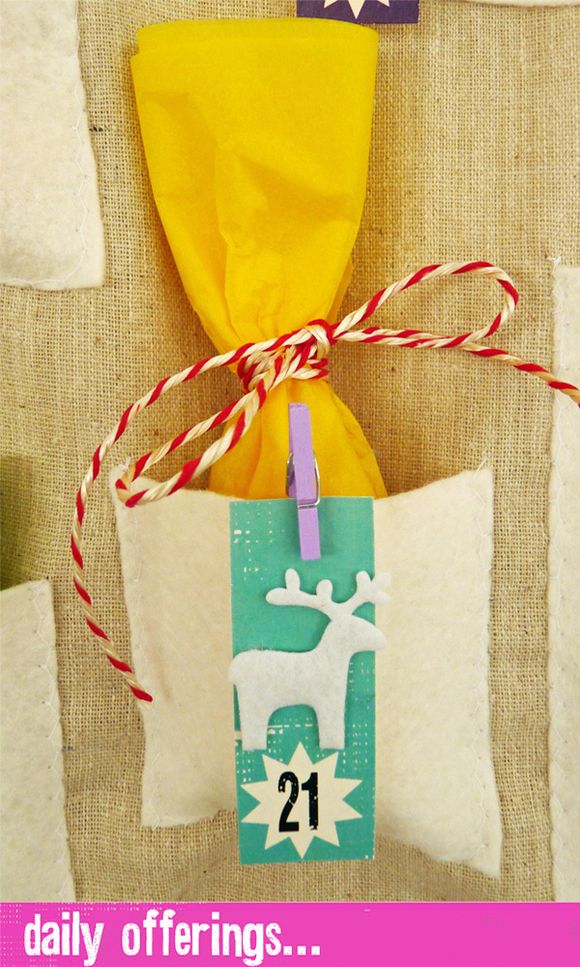
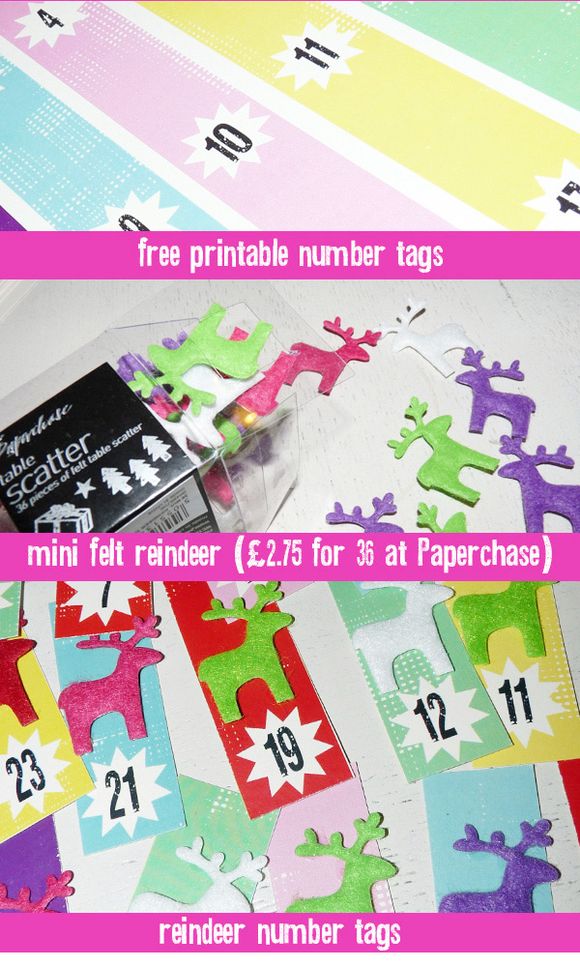
As a wedding stationery designer, I designed some cute and colourful number tags to make the countdown to Christmas that bit more exciting. You can download them for free, print yourself and use to you heart’s content. For this project, I recommend printing them on card for longeivity – if you don’t have this facility at home, just pop into your local independent printing company where you can expect to pay around £1.50). We then used these amazingly cute mini reindeer from Paperchase to stick on the tags…
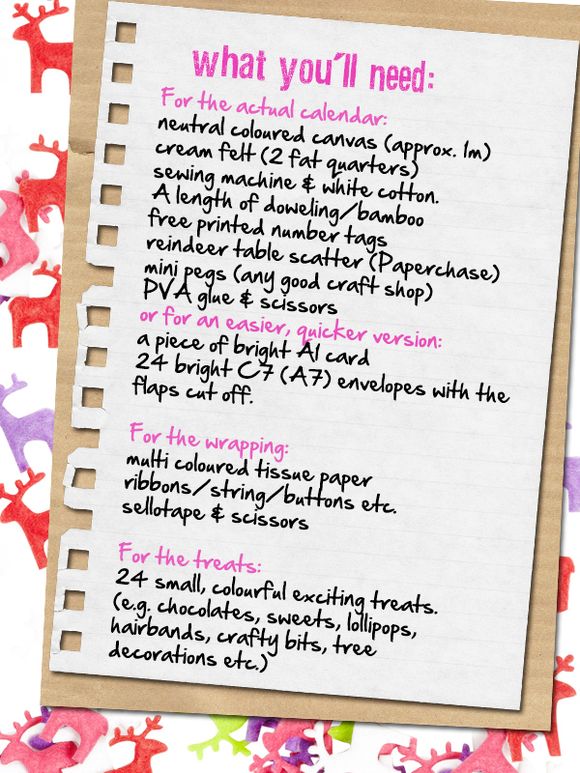
So, to get down to business, here’s what you’ll need:
Some of the unofficial things I highly recommend you might also need are several cups of tea (and in our case a bottle of baileys!) and a good friend/mum/sister etc. to keep you company. There are many great things about DIY projects, but the biggest one for me is that it’s a wonderful way to spend an evening with someone great.
Above (in the ‘What you’ll need’ list) I’ve indicated that you could opt for an easier, quicker, simpler version – this would basically cut out the need for sewing expertise or machines. Simply stick on colourful mini envelopes (with the flaps cut off) on to a large (A1) piece of brightly coloured card/board and follow the same process the rest of the way.
Here’s how we went about making our calendars:
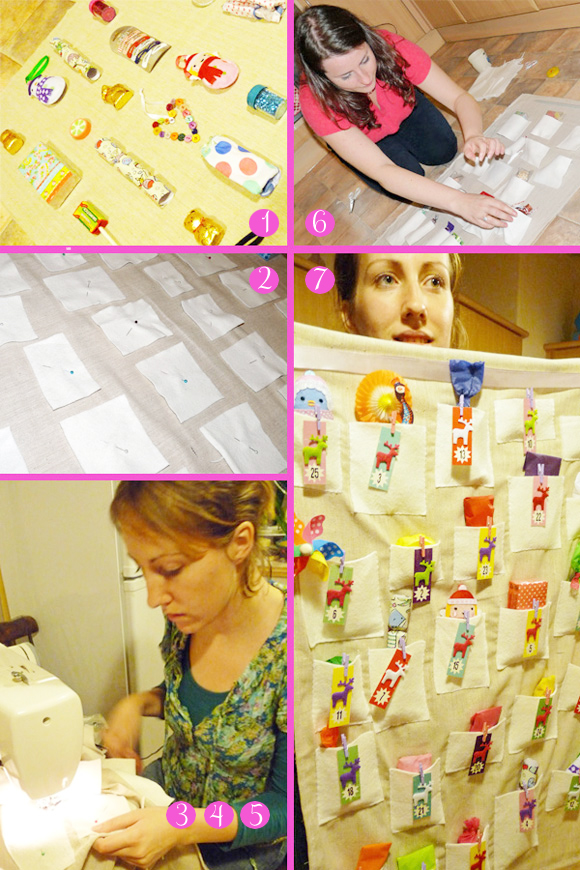
Step 1: Lay out your gifts on your canvas. Make sure you leave ample space above each present for your pretty wrapping to peek out. Also, make sure you leave a strip at the very top at least 8 inches wide, for you to sew in your bamboo/doweling/stick which will hold the whole thing up.
Step 2: Cut squares of felt large enough to cosily tuck in each gift, and pin them on to the canvas when your happy with the layout of the pockets.
Step 3: Using a zig zag stitch and light cotton, sew the pockets on making sure you leave the top as the open side. Use a little bit of reverse stitching in each corner to prevent the top corners fraying or coming loose.
Step 4: Turn your calendar over, and fold the top of the canvas over your bamboo to enclose it. Sew it in and sew both sides up so it doesn’t come out.
Step 5: Sew on a ribbon on to the reverse (in the middle at the top – which you’ll use to hang the calendar) as well as any other decorative trimmings you might like to use).
Step 6: Now your calendar’s ready, cut out your free colourful number tags and glue on the reindeer. One they’re dry, you can use tiny pegs (available at most good craft shops) to attach them to your pockets.
Step 7: Fill with your lovely wrapped up goodies (you might like to leave some of the really bright ones unwrapped too) make a cup of tea and admire your hard work until it’s time to give it away to someone special.
Big thanks to Annabel for inviting us to share this project with Love My Dress readers. Whether you make this or not (best of luck if you do!) a very happy Christmas to all – hope this feature gets you in the festive mood. X
♥ ♥ ♥
It really is pretty easy – even I'm going to try it! 🙂 Huge thanks to Jenny again – please take a moment to visit Jenny's website In The Treehouse where you will find all kinds of beautiful wedding day stationery.
See lots more 'How To' and 'DIY Bride' features here.
Happy crafting all 🙂
Much love,
Annabel xXx
♥

