It's been a while since we featured any DIY posts here on Love My Dress, so it's with great delight I bring you our latest 'how to' feature, courtesy of the rather darn fabulous florist, Claire Sankey of Lily & May.
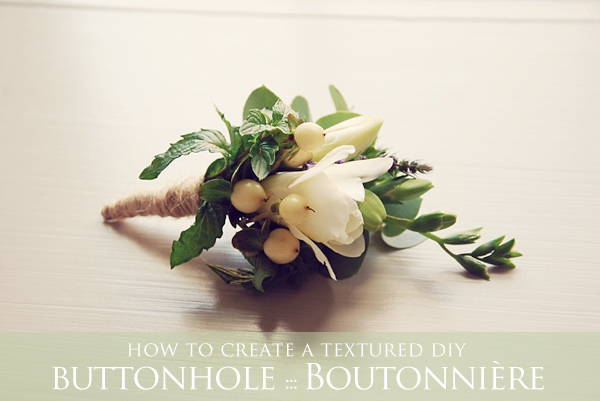
Claire and I thought it would be a lovely idea to share with you a simple and easy DIY buttonhole tutorial. We all love a good buttonhole, don't we? They add a touch of fabulousness to the gent's outfit and make for rather lovely wedding photographs too – we have a whole Pinterest board dedicated to them.
By the way, if you like this DIY tutorial, you can download it here in PDF format.
Over to you Claire!
At Lily & May we love creating textured buttonholes, perfect for an informal relaxed wedding. If you are feeling creative follow our steps below.
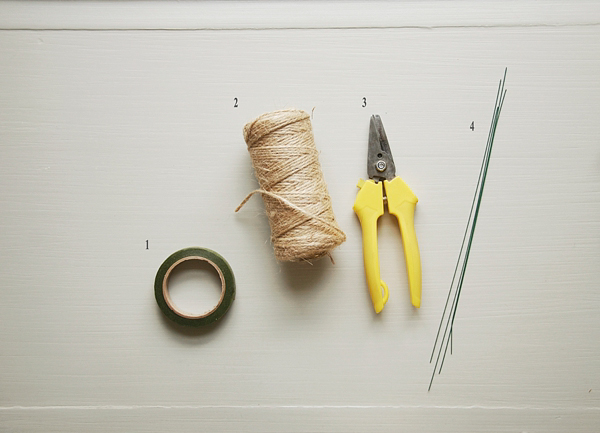
Firstly you will require a few tools to work with:
1. Floral tape
2. Twine (this is for decoration)
3. Scissors
4. Stub wire (the thickness will depend on the flowers used, for heavier flowers use thicker wire).
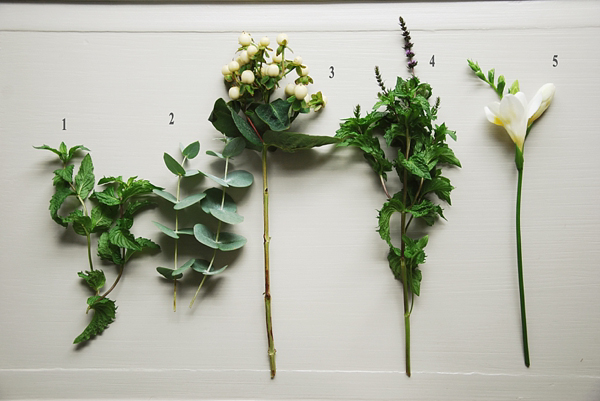
We have used 0.56mm and 0.32mm in this tutorial as the flowers are relatively light. For the tutorial I have decided to use the following:
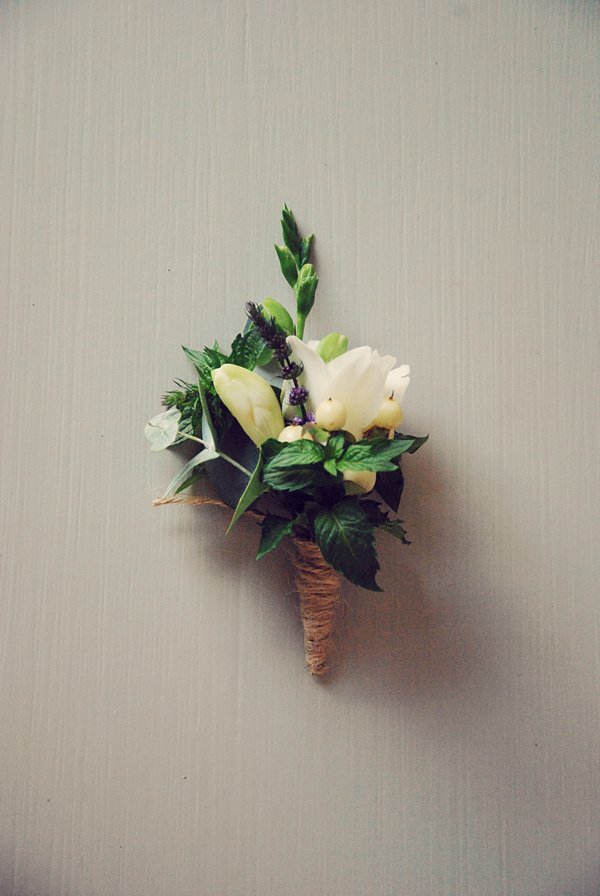
1. Mint leaves (Rosemary is another excellent herb for buttonholes)
2. Eucalyptus Cinerea
3. Hypericum Berries
4. Mint
5. Freesia
Next each stem will need to be cut to the required length, ensuring any unwanted leaves are removed.
Cut each stem to approximately 9cm (you can always make this shorter at a later stage).
Each stem will now need to be wired, it is possible to simply place the materials together without this step. However, I prefer to wire as this helps to strengthen delicate flowers and make the placement more flexible.
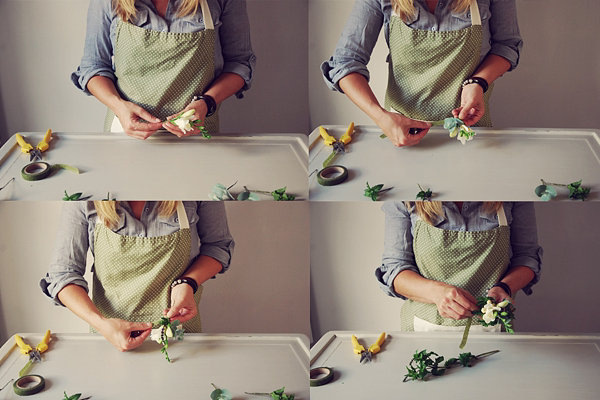
Hold the flower between your thumb and index finger and position a wire behind the stem one third the way up.
Bend the wire ends together -with one length shorter than the other.
Holding the shorter length of wire parallel with the stem, wrap the long wire leg around both the stem and the other wire leg.
Straighten the long wire.
Repeat this process with all of your flower materials.
The next stage is to tape each wired stem, this not only helps to cover the wire but assists with holding moisture for the flower.
Wrap a piece of floral tape around the top of the wire and flower stem. Twirl the stem while stretching and pulling the tape downward. The tape should be tightly wrapped around the wire and flower stem without any gaps.
Repeat the above process for each flower stem.
Now to place the flowers together. Start with your focal flower (usually the largest) in this instance the freesia is the focal.
Add each of you materials to the freesia by taping the stems together. Remember this will be placed on a lapel so all flowers must be facing the same way.
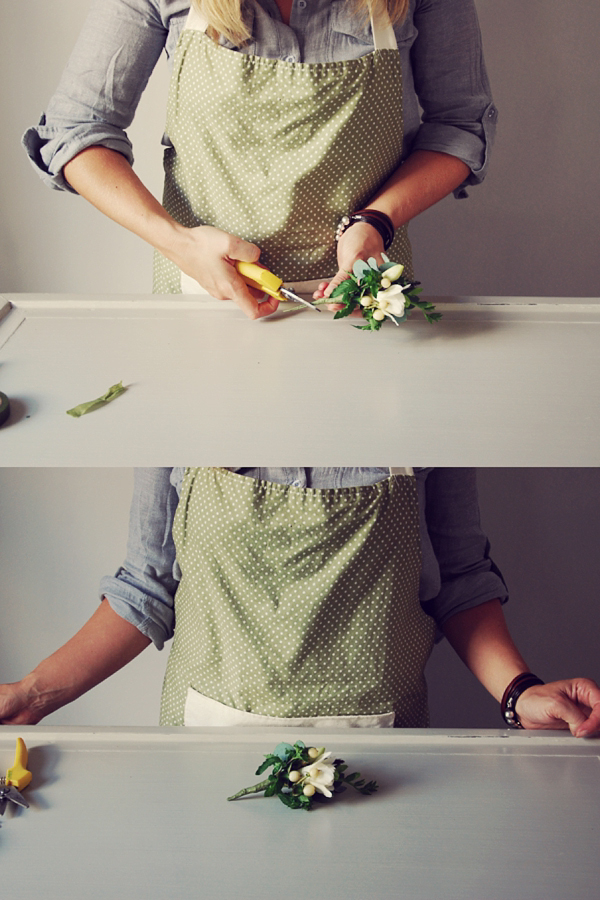
Once all the flower materials are securely taped together, cut the wired stems to the length required. Secure tape over the exposed wires, ensure these are well covered and no sharp ends can be seen.
Your buttonhole is now complete and ready to use. I also added some twine for that finished touch, this can be tied or wrapped around the stem.
Woohoo! How easy-peasy was that? Fabulous stuff, and remember you can download this full tutorial in PDF format here.
I'd like to also encourage you to visit the Lily & May website, Claire really is a superb florist and I adore her work. You can see some of her beuatiful floristry right here on Love My Dress too.
Much love my green-fingered friends,
Annabel











Very pretty. Once you’ve mastered the buttonhole how about trying a bouquet? My 1st ever job was in a florist on a Saturday. It lasted 3 yrs and I loved heping with the wedding flowers.
I’m currently planning my wedding for next summer but as a young couple we are trying to do as much ourselves as humanly possible 🙂 I love reading posts like this that show its easy to make beautiful pieces for you wedding without a massive price tag 🙂 Inspiring page x
So useful! Definitely going to try this out. Thank you x